Before you start, check all three: mains power within reach of the tank, WiFi that actually reaches the box, and some way to get the probe to the bottom — any access port will do.
The whole job, in one loop
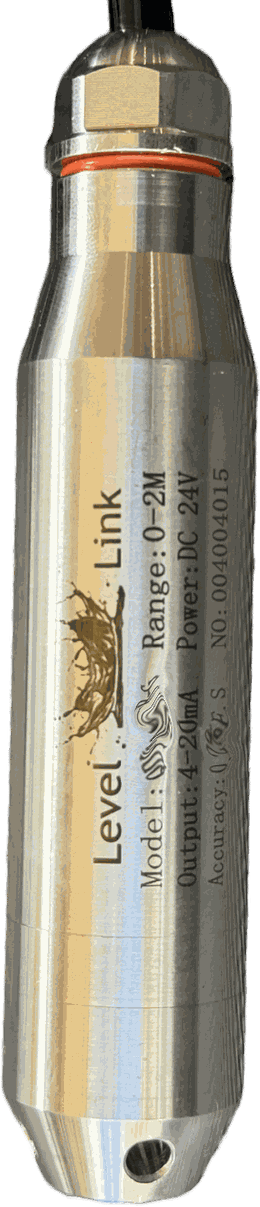
Place the probe on the tank floor
Uncoil the cable fully before lowering it — a kink in the air tube inside the cable will make the reading drift. The probe settles on its side on the bottom and stays there.
Mount the control box on top
Weatherproof, designed to live outside in the rain and sun. The probe cable runs straight up out of the tank into the box. Point the antenna toward your network.
Join it to your WiFi
A new unit broadcasts LevelLink-Connect-Here so you can tell it about your network. From then on it reports from anywhere.
Read your tank, and see where the water goes
Tell the app your litres per metre and the level becomes litres. Individual events separate out — a shower, a washing machine, an irrigation cycle — which is what makes the usage figures worth believing.
-
Place the probe on the tank floor
The stainless steel pressure probe stays permanently on the bottom of the tank. Uncoil its cable fully before lowering it — the cable carries a hollow air tube alongside the wires, and a kink in that tube will make the reading drift.
Lower it gently through any suitable access port. If your concrete tank has no opening, a 30 mm hole is enough for the 29 mm probe, but this is rarely necessary.
Do not drop the probe in on its cable, and do not leave the cable coiled. Those are the two things that cause a bad reading on an otherwise perfect install.
-
Mount the control box on top
The box is weatherproof and designed to live outside on top of the tank, in the rain and the sun. It can simply sit there, or mount on a pole with the optional bracket.
Point the WiFi/Bluetooth antenna to give the best signal toward your network — this is the single thing most worth spending two minutes on, because everything else depends on the connection holding.
-
Connect power
Run the supplied low-voltage cable from the plug pack to the box. It is 10 m as supplied, can be extended, and is safe to bury. The tank end runs at low voltage, not mains.
Turn the power on. The status LED will show the unit is alive.
-
Download the app
Scan the QR code on the box, or search the App Store for LevelLink. The app is free.
Inside the app, the ? button on the Settings page carries help for each part of the setup as you go.
-
Join the LevelLink to your WiFi
A brand-new unit broadcasts its own temporary network so you can tell it about yours.
- On your phone or tablet, open Settings → WiFi.
- Look for the network named LevelLink-Connect-Here and join it.
- A setup page should open by itself. If it does not, open Safari and go to
http://192.168.4.1. The app's Help section also has a Go to WiFi Section button that opens it for you. - Choose your own WiFi network — pick the one with the best reception at the tank, not necessarily the strongest one in the house — and enter its password.
- Press Save. The unit reboots and joins your network.
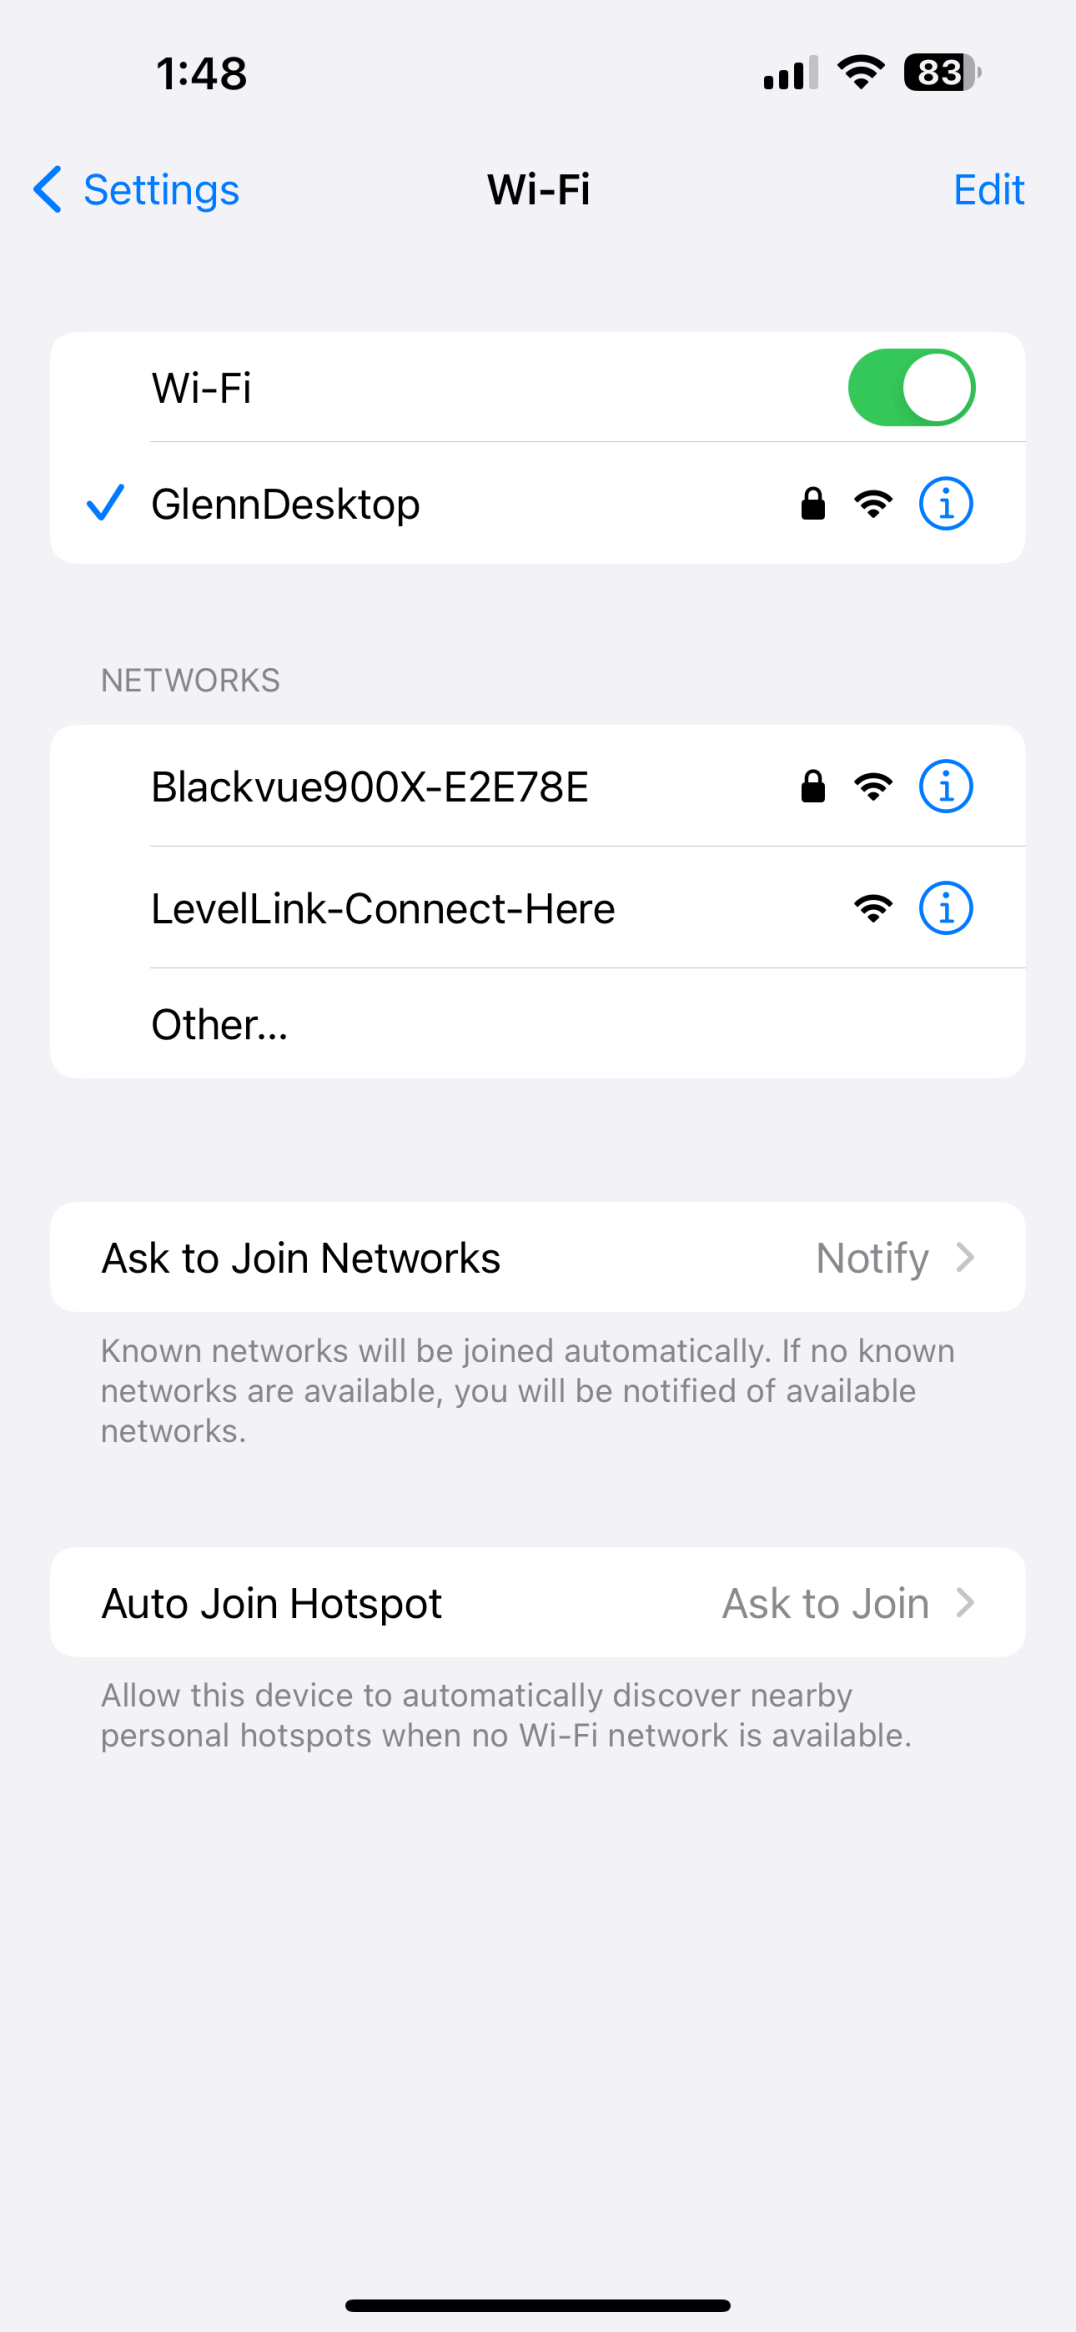
Find LevelLink-Connect-Here 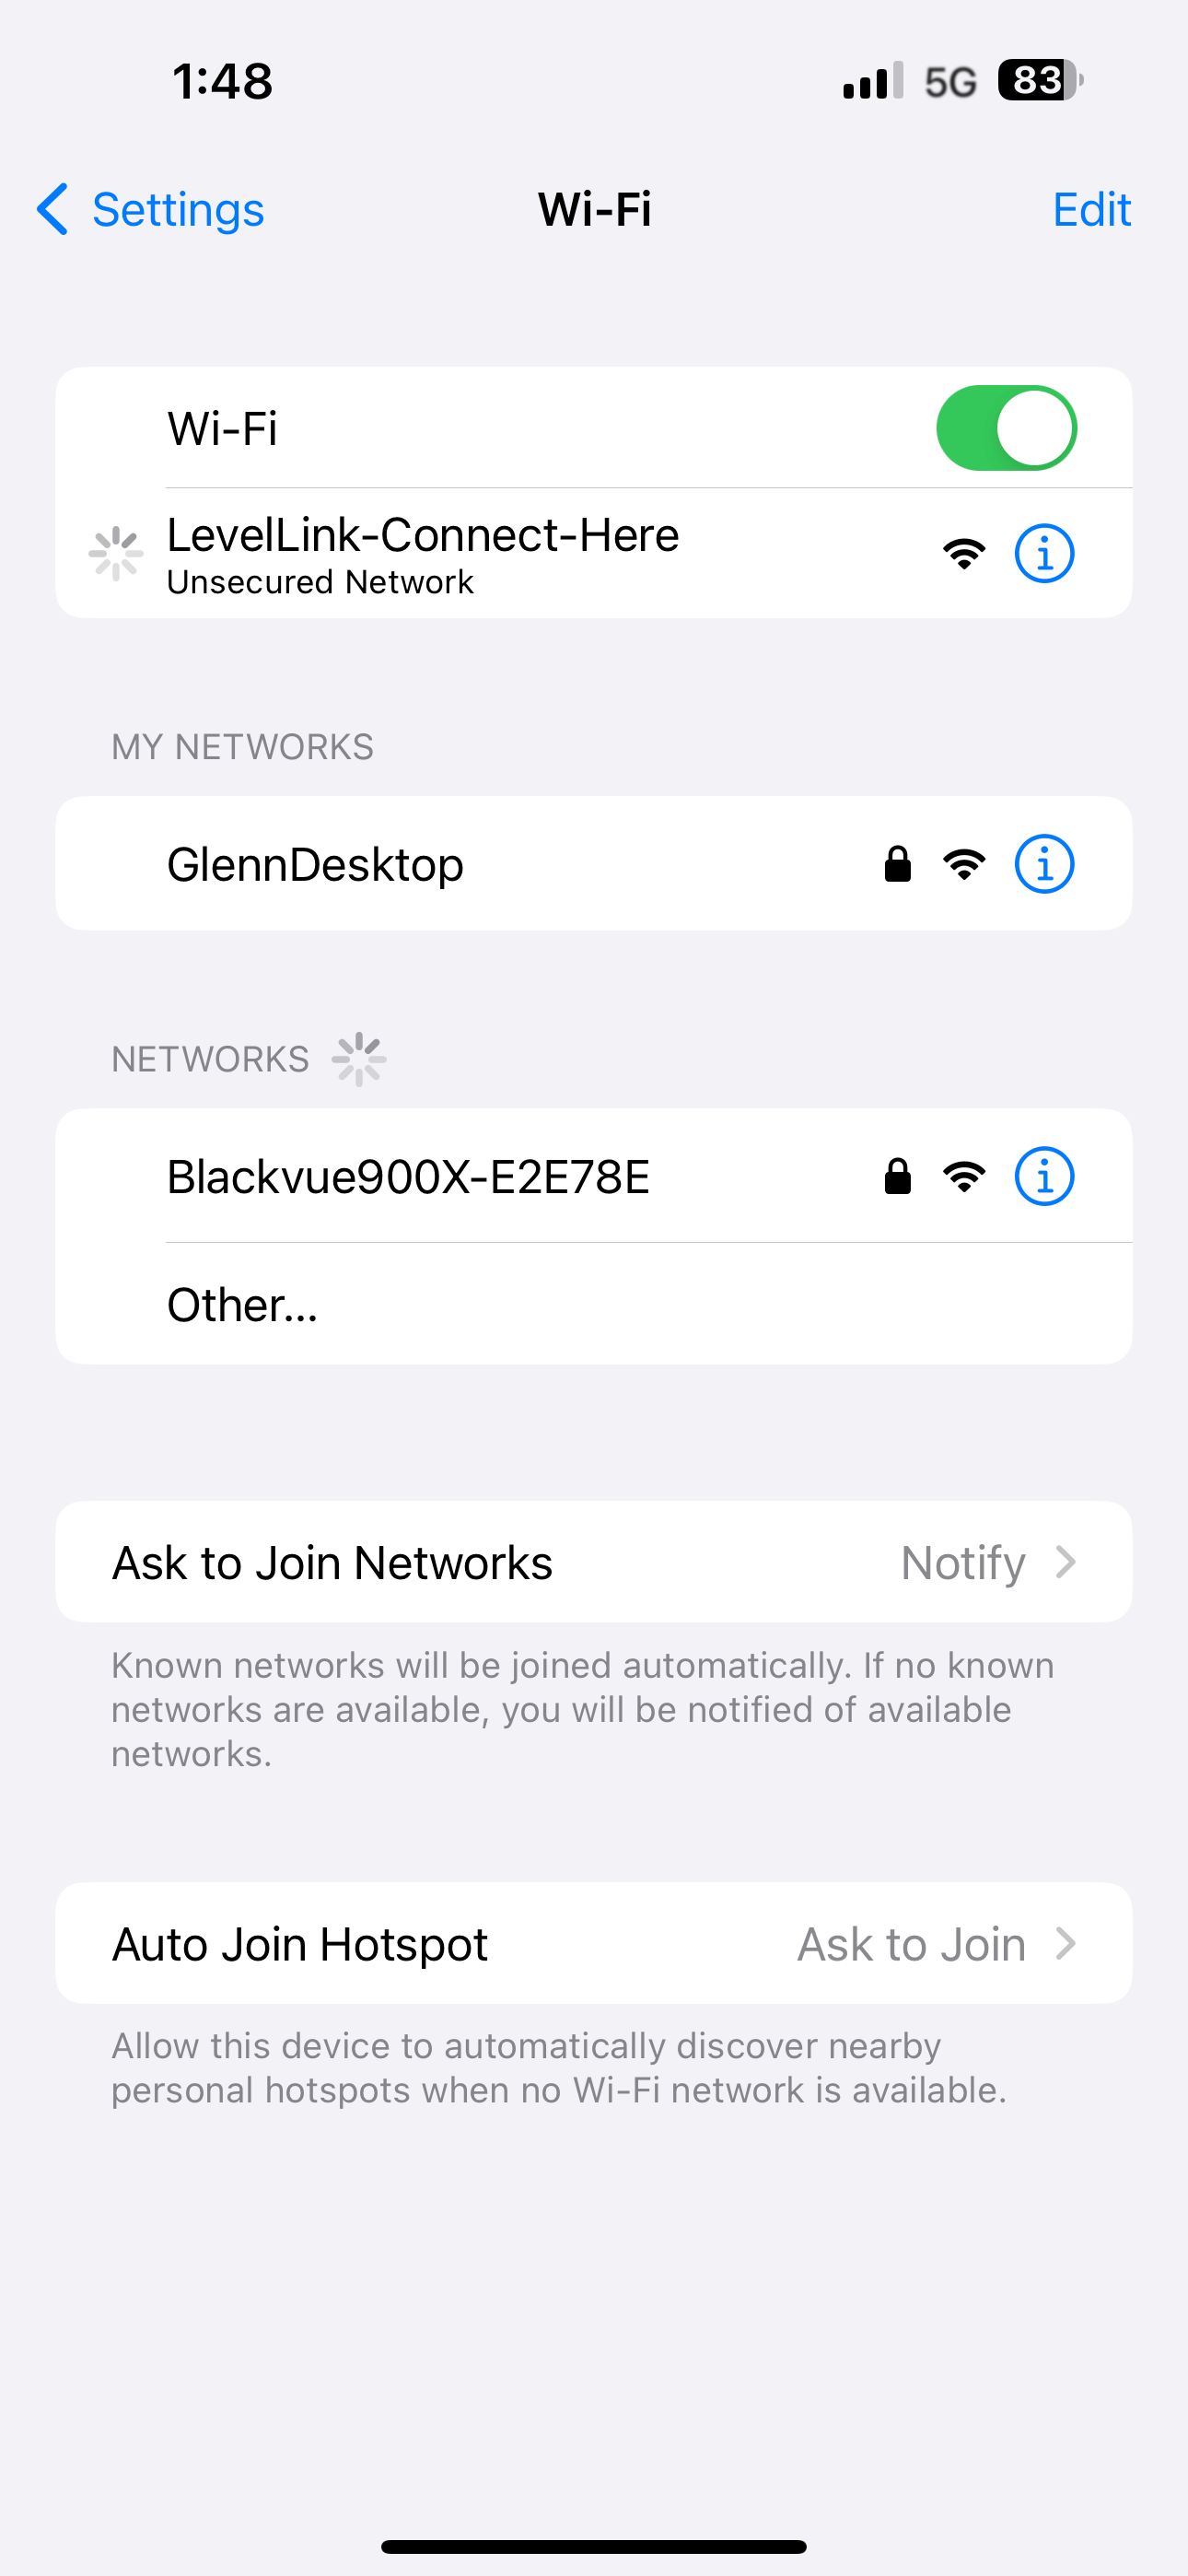
Join it 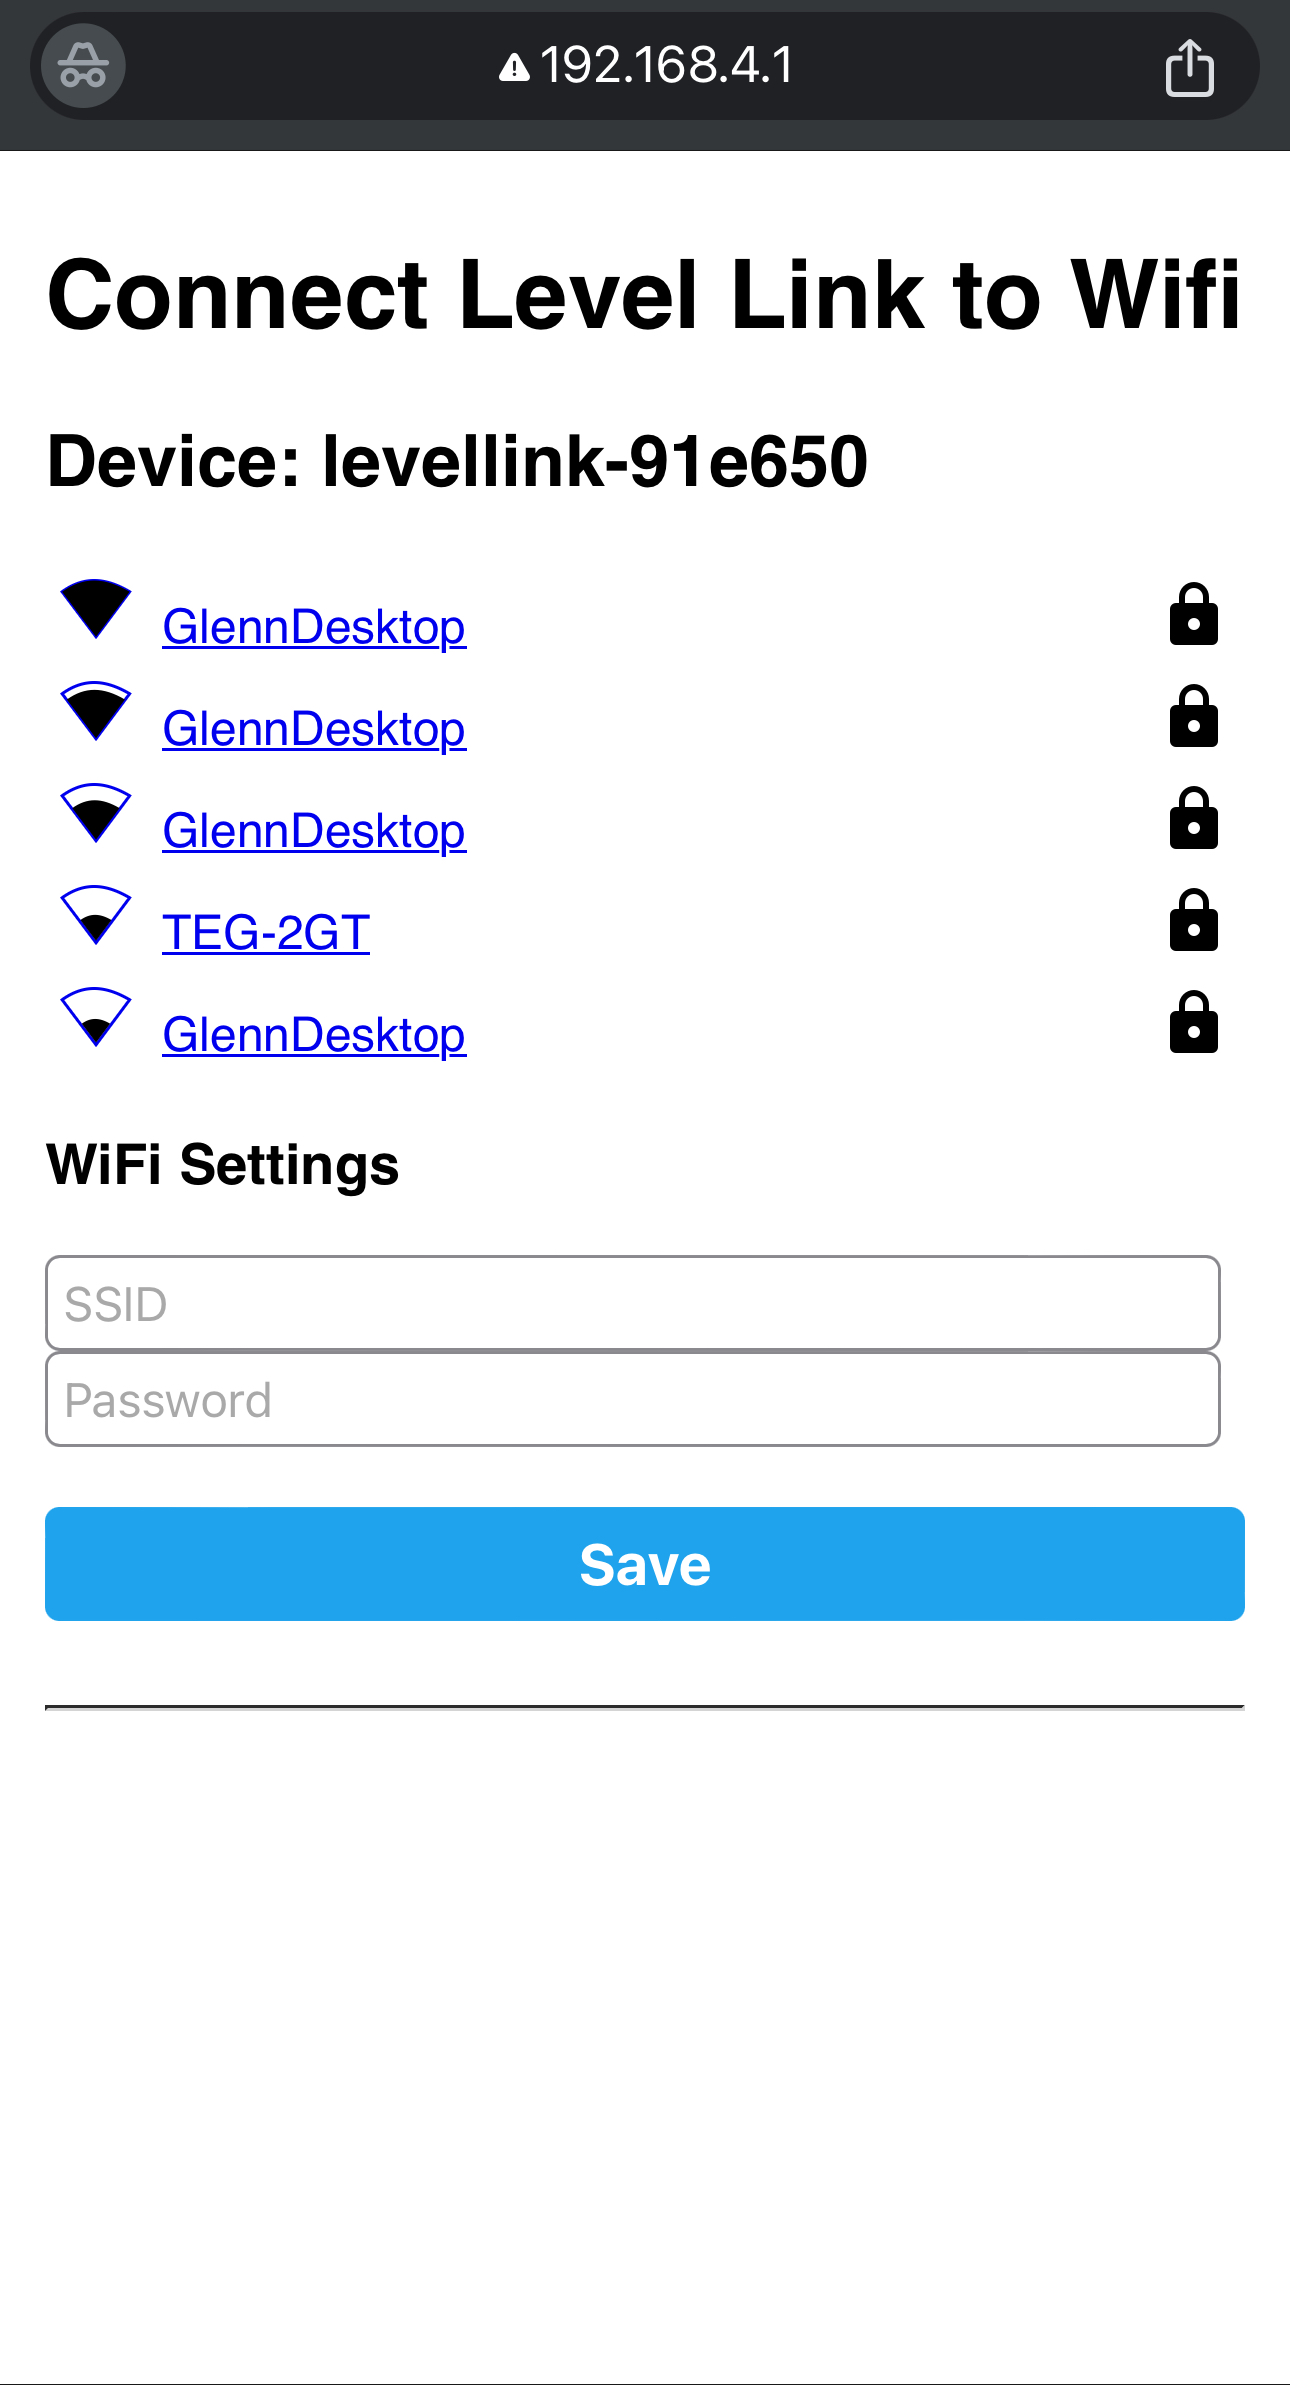
The setup page opens 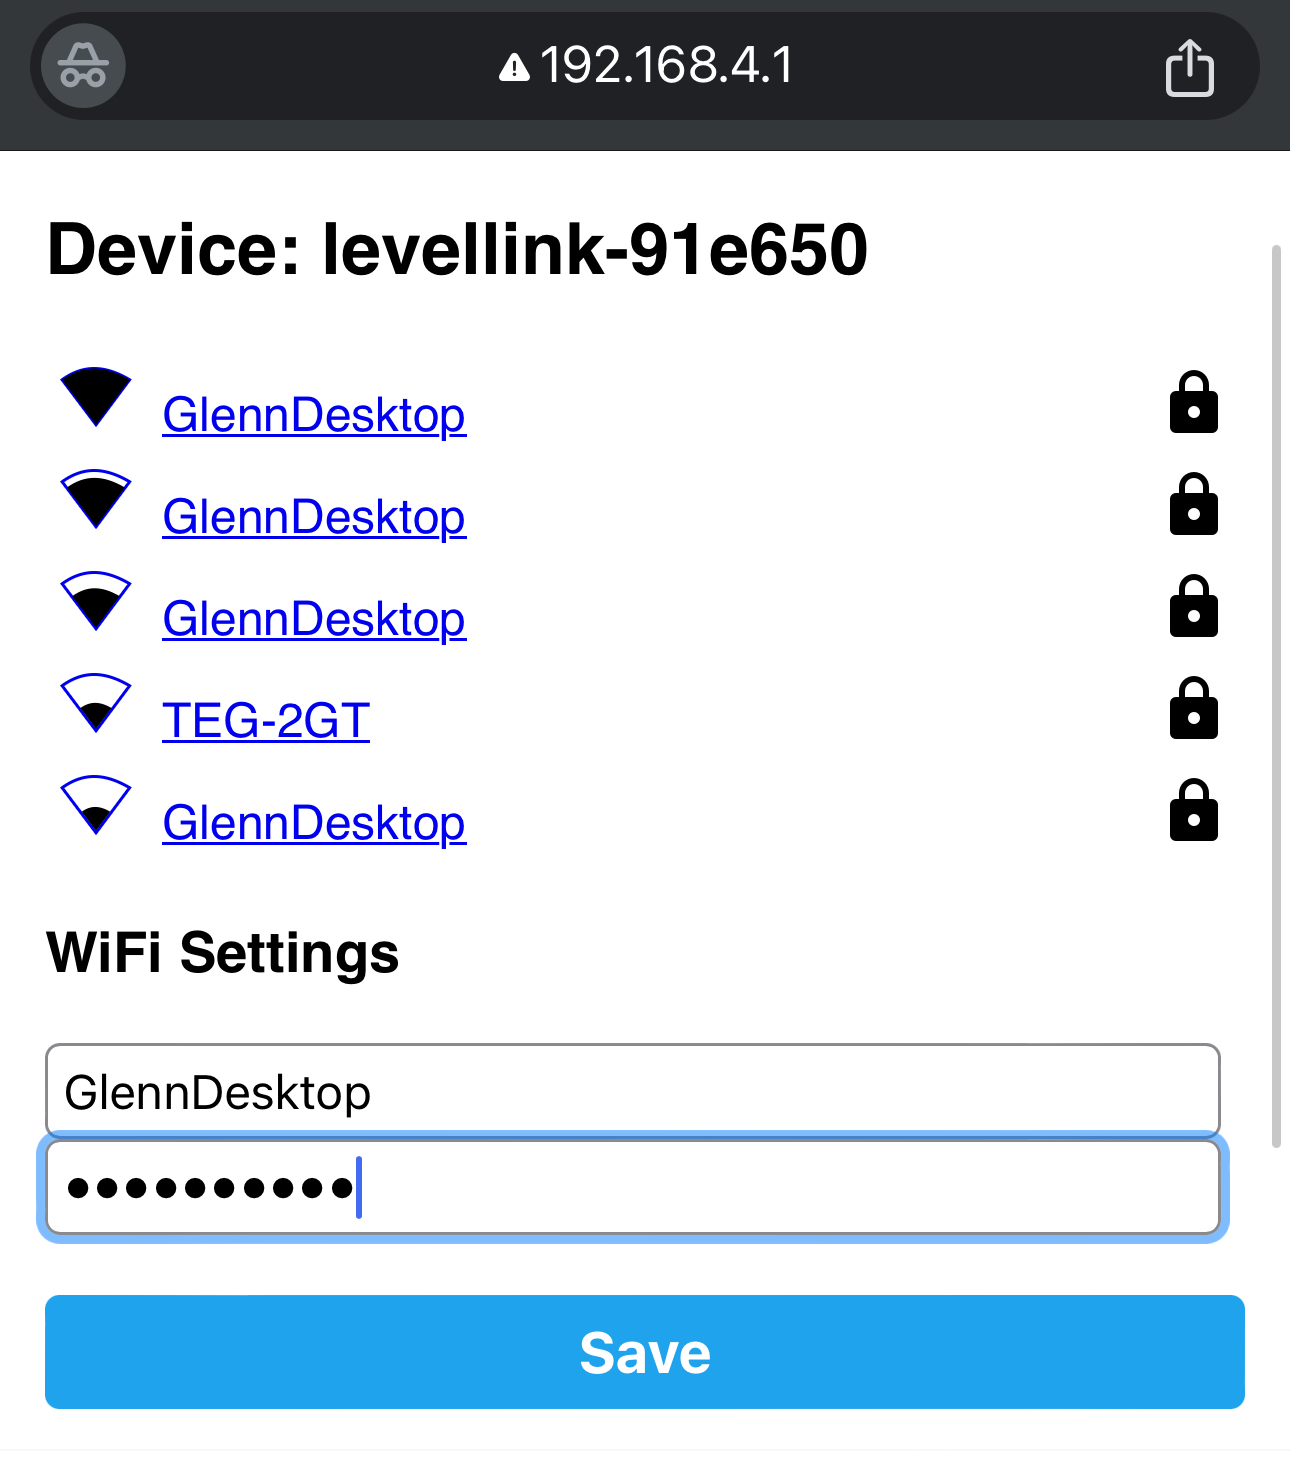
Enter your network, Save Now return to the LevelLink app, go to the Settings page and press Search for WiFi Devices. Your unit should appear. Tap it, and the level is on screen.
If it does not appear, the usual cause is the unit being on a network your phone is not on — a 5 GHz band it cannot reach, or a guest network. Rejoin your phone to the same network the unit was given and search again.
-
Set up the tank in the app
Three settings, only one of which really matters.
Setting What it does Max water level height Cosmetic. It scales the tank graphic so a full tank looks full. Litres per metre The important one. Measure your tank and work out how many litres one metre of depth holds. Every usage figure, alert and prediction is computed from this, so a wrong value makes the litres wrong while the depth stays correct. Take the time to get it right. Change % Cosmetic display preference. -
Subscribe, if you want the analysis
The device, the app, the level and the fault alarms all work without a subscription. The subscription adds the server-side work: usage events, abnormal-usage alerts, daily summaries, run-out predictions and remote monitoring of several tanks.
If something is not right
The support page covers the common ones — no recent reading, a level that looks wrong, and what each fault message means. If you would rather just ask, email support@levellink.com.au with your Hardware ID and we can look at your tank's history directly.